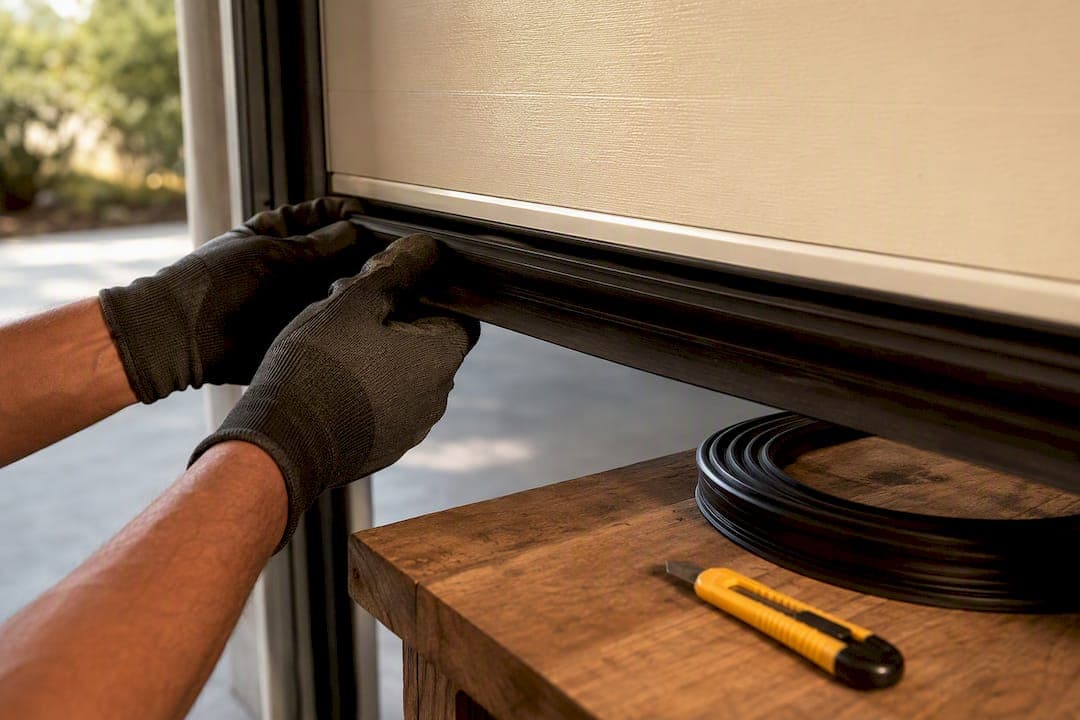
Garage door weather stripping seals the gaps around your door to block drafts, water, and pests, and the fastest way to spot a failing seal is the bottom seal running under your door. Check it first, then confirm the problem by killing the garage lights at night and looking for daylight leaking through, or by shutting the door on a strip of paper and seeing if it slides out too easily.
TL;DR:
- Proper inspection, including the light and paper tests, can identify failing seals early and prevent water and pest intrusion.
- The most common bottom seal type is T-style, which slides into a retainer track, but bulb or U-channel seals suit uneven floors better.
- Seals should be checked twice a year and replaced if cracked, torn, or allowing daylight or drafts, especially after extreme weather.
- DIY replacement is straightforward for the bottom seal, but bent tracks or damaged jambs require professional repair to ensure proper sealing.
- Using EPDM rubber seals paired with perimeter molding provides the best durability and climate resistance across most environments.
Table of Contents
- What Is Garage Door Weather Stripping and Why Does It Matter?
- What Types of Garage Door Weather Stripping Should You Use?
- How Do You Inspect Your Door for Gaps and Wear?
- How Do You Replace Bottom and Perimeter Weather Stripping Yourself?
- What Does It Cost, and Should You DIY or Hire a Pro?
- How Do You Maintain Weather Stripping for Longer Life?
- When Should You Call a Professional Instead of DIY?
- How Do You Choose Eco-Friendly Weather Stripping Materials?
- A Technician's View on Seals That Fail Fast
- Get Your Garage Door Properly Sealed by Local Pros
- Sources
- FAQ
What Is Garage Door Weather Stripping and Why Does It Matter?
Garage door weather stripping is the rubber, vinyl, or foam trim that closes the gap between your door and the frame, floor, and panels. A complete system has several parts working together: the bottom seal (sometimes called an astragal) along the floor, perimeter seals along the sides and top of the jamb, panel gaskets between sectional door segments, and brush seals for doors with uneven thresholds.
Each piece does a specific job:
- Bottom seal: blocks water, leaves, and rodents from slipping under the door
- Perimeter seals (side and top): stop wind-driven rain and cold air from leaking around the frame
- Panel gaskets: seal the horizontal seams on sectional steel doors
- Brush seals: flex over uneven concrete or gravel aprons where a rigid seal would leave gaps
Skipping any one of these leaves a hole in your defense. A complete weatherproofing system needs both a bottom seal and perimeter stop molding; replacing only the bottom strip still lets air and moisture in around the sides. The payoff for doing it right shows up in your energy bill, since an unheated garage with big gaps pulls warm air out of an attached house all winter. It also shows up in fewer mouse nests behind stored boxes and a noticeably quieter door when it closes.
Plan to inspect your seals at least twice a year, once before winter and once before summer, when temperature swings stress the rubber the most; for detailed seasonal tips, see How to Winterize Your Doors? | One Day Doors & Closets.
What Types of Garage Door Weather Stripping Should You Use?
The right weather seal type depends on your door material, your floor, and how much daylight you can see under the door right now. Garage door bottom seal sizes and profiles vary enough that picking the wrong one means it either won't fit the track or won't compress against the floor.
Bottom seal profiles come in a few common shapes:
- T-style (also called a T-astragal): a T-shaped rubber gasket that slides into a matching aluminum or vinyl retainer bolted to the bottom of the door. This is the most common setup on sectional steel doors and slides out easily for replacement.
- Bulb seal: a rounded, hollow tube of rubber that compresses under weight, popular for uneven concrete because the bulb shape flexes into small gaps.
- J-style: a J-shaped channel that wraps over the bottom edge of a wood or older steel door without a dedicated retainer track.
- U-channel garage door seal: a U-shaped rubber or vinyl strip that clips directly onto the bottom edge of the door panel, often used as a retrofit when there's no built-in retainer.
Perimeter and top seals use flat or bulb-style vinyl or rubber strips nailed or screwed to the door jamb, closing the gap between the door face and the frame. Panel gaskets are thin foam or rubber strips that sit in the seams between door sections on sectional doors, mostly there for noise and minor draft control rather than water. Threshold seals are a floor-mounted alternative, a raised rubber strip glued or screwed to the garage floor itself, useful when your slab has a permanent dip or slope that a bottom door seal alone can't bridge.
Door type steers your choice. Sectional steel doors almost always use a T-style or bulb seal in a retainer track. Older wood doors more often use a J-style or U-channel that clips over the raw edge. Roll-up doors typically pair a bulb seal with a wider retainer to handle the curl of the door as it coils.
Uneven floors change the math. If your garage floor slopes toward the door by more than a quarter inch, a rigid bottom seal will gap on one side no matter how well you install it. A brush seal adapts to uneven gaps better than a solid bulb because the bristles flex independently across the width of the door.
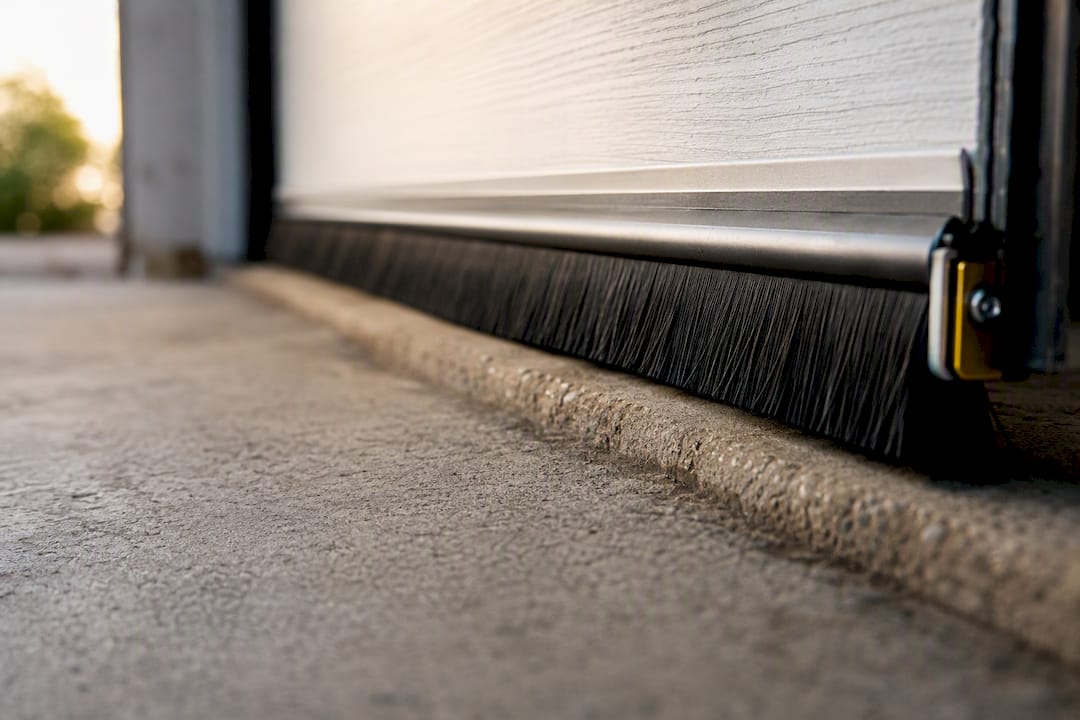
If mice or insects are a recurring problem, ask specifically for a rodent-resistant seal. These typically embed a stainless steel mesh strip inside the rubber, letting the seal still compress normally while stopping small animals from chewing through.
How Do You Inspect Your Door for Gaps and Wear?
Two low-cost tests tell you almost everything you need to know before you spend a dime on new seals.
- Run the light test. Close the garage door completely, turn off every light inside the garage, and wait until it's fully dark outside or dark in the garage. Walk the full perimeter of the door from inside and look for any visible daylight or light bleeding through the bottom, sides, or top.
- Run the paper test. Slide a sheet of paper or a dollar bill under the closed door at several points along the bottom seal. If it pulls out with little to no resistance, the seal isn't compressing enough to block drafts.
- Check for physical damage. Run your hand along the bottom seal and feel for brittleness, cracking, or flattening where the rubber no longer springs back.
- Look for water or debris trails. Check the garage floor near the door edges for water stains, leaf litter, or small pest droppings after a storm.
- Note where the gaps are. Write down which side (left, right, bottom, or a specific panel seam) shows light or lets air through, since that detail speeds up a professional estimate if you decide to call one.
Beyond those tests, a few objective signs mean it's time to replace rather than patch. Visible daylight anywhere along the seal, a noticeable draft you can feel with your hand a few inches away, seal material that's cracked or crumbling instead of flexible, and any water intrusion after rain or snowmelt all point to a seal that's past its useful life. Pest droppings or chew marks near the bottom seal are another giveaway that the current barrier isn't doing its job anymore.
Most seals show these signs gradually over a few seasons, so don't wait for a total failure. Catching a cracked bottom seal in early fall means a $30 fix instead of a spring full of water damage to whatever you're storing near the door.
How Do You Replace Bottom and Perimeter Weather Stripping Yourself?
Replacing a bottom seal is genuinely one of the easier garage door repairs a homeowner can tackle solo, but the process still involves a heavy door and, on newer setups, spring tension nearby. Respect both.
Safety first. Never work near the torsion spring or lift cables, even for a seal job that seems unrelated. If your door doesn't stay open on its own, prop it securely with a locking C-clamp on the track or have a helper hold it, and disconnect the opener if you're leaving the door raised for more than a few minutes. If the retainer track itself is bent, rusted through, or the door doesn't sit flush against the floor even after a new seal, stop and call a professional instead of forcing a fix.
- Raise the door fully and secure it so it can't drop while you work underneath.
- Remove the old bottom seal by sliding it out of the retainer track lengthwise, or pulling the fasteners if it's a J-style or U-channel that clips over the edge.
- Clean the retainer channel with a rag and mild detergent to clear out old rubber fragments, dirt, and grit that would keep the new seal from seating properly.
- Measure the door's width and add roughly one to two inches of cutting allowance so you can trim the new seal to an exact fit rather than coming up short.
- Feed the new bottom seal into the retainer. A little silicone-based lubricant helps rubber slide through the channel without binding, especially in cold weather when rubber stiffens up. Trim the excess at the end with a utility knife.
- If there's no retainer track, nail or screw a U-channel or J-style seal directly to the bottom edge, spacing fasteners every 8 to 12 inches so the seal doesn't buckle between them.
- Move to the perimeter seals. Measure the height of both side jambs and the width of the top separately. Miter the corners at 45 degrees where the side and top pieces meet for a tight seal rather than a butted gap.
- Fasten the perimeter molding with the recommended screw spacing (usually every 12 to 16 inches), keeping the flange snug against the door face without pinching it so tight the door drags when it closes.
- Lower the door and test. Run it through a full open and close cycle to confirm nothing catches, and check for any new grinding or hesitation that suggests a fastener is sitting too far into the door's path.
- Re-run the light test with the door closed to confirm the new seals actually closed the gaps you found earlier.
Pro Tip: Cold rubber cracks and tears more easily than rubber at room temperature. If you're installing seals in winter, let the new strip sit indoors for an hour before working with it, and it will flex into the retainer far more easily.
If the door drags or the opener strains after installation, the perimeter flange is probably sitting too close to the door face. Back the screws out slightly and reposition before tightening again. For a deeper walkthrough with photos of retainer types, see this guide on replacing a garage door weather seal.
What Does It Cost, and Should You DIY or Hire a Pro?
Tools you'll need: a tape measure, utility knife, rubber mallet, screwdriver or drill, and a caulking gun if you're also sealing the threshold. Most of these are already in a basic homeowner toolbox; if not, a hardware store rental or a cheap multi-bit driver covers it for under $20.
Materials and typical price ranges:
- Bottom seal (T-style, bulb, or U-channel): roughly $20 to $80 depending on door width and material
- Side and top perimeter seals: roughly $15 to $40 per set
- Threshold seal kits: similar range to bottom seals, varying with door width
- Panel gaskets: sold by the foot, usually a minor add-on cost to a bottom or perimeter job
Cost snapshot: DIY weatherstripping materials typically run $20 to $80 for a bottom seal and $15 to $40 for side and top seals, while full professional installation of all garage door weatherstripping commonly falls between $100 and $300, depending on door size and seal quality.
What pushes professional pricing toward the higher end of that range: a double-wide door, a rodent-resistant or premium EPDM seal, a damaged retainer track that needs repair first, or an uneven threshold that requires custom fitting rather than a stock kit. If your inspection turned up a bent track or a floor that's sloped enough to defeat a standard bottom seal, budget for that repair separately since it's a different job than the seal itself.
How Do You Maintain Weather Stripping for Longer Life?
A seal that's cleaned and lubricated on schedule easily outlasts one that's ignored until it cracks.
- Inspect twice a year, ideally right before winter and right before summer when temperature swings are hardest on rubber and vinyl.
- Clean seals with mild detergent and water to remove dirt, grit, and road salt that dry out rubber over time.
- Apply a silicone-based lubricant to rubber and vinyl seals a couple of times a year to keep them flexible instead of stiff and prone to cracking.
- Use a UV protectant spray on seals exposed to direct sunlight, since UV exposure is one of the fastest ways vinyl seals go brittle.
- Keep a spare cut of bottom seal on hand if your climate is harsh; a pre-measured spare means a five-minute swap instead of a same-day scramble when a seal fails mid-winter.
Seal lifespan typically runs 3 to 10 years depending on material and climate, with harsher winters and constant sun exposure landing you at the shorter end of that range.
Pro Tip: Mark the install date on the retainer track with a permanent marker when you fit a new seal. It sounds simple, but most homeowners have no idea how old their current seal actually is, which makes it hard to judge whether cracking is normal wear or early failure.
For a broader seasonal checklist beyond just the seals, this guide on winter-proofing a garage door covers insulation and opener care too.
When Should You Call a Professional Instead of DIY?
Some situations go beyond a seal swap and into structural repair territory, and forcing a DIY fix on those just means buying the same seal twice.
- The retainer track or door jamb is bent, rusted through, or pulling away from the frame. A new seal can't compress evenly against a damaged track, so fixing the retainer or jamb has to come before the seal replacement, not after.
- The garage floor has a significant slope or dip that no standard bottom seal or threshold kit addresses without custom trimming.
- You're dealing with a commercial door, a rolling steel door, or anything with exposed springs and cables you're not confident working around.
- The door drags, binds, or the opener strains even after a seal adjustment, which usually points to a track or spring issue rather than the seal itself.
When you do call someone, ask direct questions before you agree to anything: Have they worked on your specific door type before? Is the estimate written and itemized, or a verbal ballpark that could change on the day? What warranty covers the parts and the labor separately? Are they licensed and insured for work at your property?
Red flags worth walking away from: a quote that balloons once the technician arrives, pressure to sign same-day financing before you've seen a written number, or vague answers about warranty coverage. For more on why the installation itself matters as much as the seal you buy, see why professional installation matters.
How Do You Choose Eco-Friendly Weather Stripping Materials?
Material choice affects more than your energy bill. EPDM rubber, a synthetic compound built to resist UV breakdown and temperature swings, holds up longer than vinyl in most climates, which means fewer replacement cycles and less material heading to a landfill over the life of your door. Vinyl costs less upfront but cracks faster under sun and cold, so the "cheaper" option often isn't cheaper once you count a second or third replacement.
Some manufacturers now offer seals made from recycled rubber content, which perform comparably to virgin EPDM for a bottom seal application. If durability and reduced waste both matter to you, look for recycled-content options specifically labeled for that, rather than assuming any rubber seal qualifies.
Beyond the material itself, a well-sealed garage door reduces the energy your HVAC system burns fighting drafts from an attached garage, particularly if you have a room above or beside it. Fewer replacement cycles and lower energy loss both add up over a decade of ownership, even if neither shows up as a single dramatic number on your utility bill.
Foam seals typically use the least material per linear foot but also degrade fastest under UV exposure, so they're a reasonable budget pick for a garage that stays shaded most of the day and a poor pick for a south-facing door that bakes in direct sun.
A Technician's View on Seals That Fail Fast
Most of the bottom seals I've seen fail early didn't fail because the rubber was bad. They failed because nobody fixed the retainer track first, so the new seal sat crooked from day one and wore through in a single season. That's the pattern worth remembering: a seal is only as good as the track or jamb holding it.
The other pattern I'd flag is timing. Homeowners tend to notice a bad seal in the middle of a cold snap or a heavy rain, which is the worst possible moment to discover a bent track needs welding or a jamb needs rebuilding. Catching it during a routine fall inspection avoids that scramble entirely.
If a seal job turns into something bigger once you're under the door, that's exactly the kind of call worth making before you're stuck standing in a puddle. Check the services page if a quick inspection sounds like the better move.
— Eddie
Get Your Garage Door Properly Sealed by Local Pros
Local garage door repair companies can provide straightforward estimates for issues like light under the door, drafts, or cracked seals, often over the phone before a technician arrives.

That upfront pricing approach matters most on a job like weather stripping, where a bent retainer or an uneven threshold can turn a $30 part into a bigger repair. A professional repair service can help with a range of garage door weather sealing needs, from seal replacement to fixing retainers or tracks, as well as tune-ups, opener repair, and emergency service outside business hours. Many garage door repair services aim to complete most jobs the same day they're scheduled and offer warranties on parts and labor.
If your light test or paper test turned up gaps you'd rather not fix twice, visit the services page to get a phone estimate and get it done right the first time.
Sources
- The Complete Guide to Garage Door Weather Stripping
- Complete Garage Door Weatherproofing Guide for 2026 | GarageDaily
- How to Install Garage Door Weather Stripping & Weather Seals | Overhead Doors
- Garage
FAQ
What Is the Best Weather Stripping for Garage Doors?
EPDM rubber bottom seals paired with matching perimeter molding hold up best across most climates because EPDM resists UV breakdown and temperature swings better than standard vinyl. The right profile (T-style, bulb, or brush) still depends on your specific door and floor condition.
Can You Replace Garage Door Weather Stripping Yourself?
Yes, replacing a bottom seal is a common DIY task that mainly requires measuring, cutting, and sliding the new seal into the existing retainer track. Skip the DIY route if the retainer track itself is bent or damaged, since that repair calls for a professional.
How Do You Choose the Right Garage Door Weather Stripping?
Match the seal profile to your door type first (T-style or bulb for sectional steel, J-style or U-channel for older wood doors), then check your floor for slope or unevenness, which may call for a brush seal or threshold kit instead of a standard bottom seal.
How Can You Weather Seal a Garage Door Completely?
Start with the bottom seal, since it handles the most water, pest, and draft control, then add matching perimeter seals along the sides and top to close the remaining gaps. Test the whole system afterward with the light test, checking for daylight around the full perimeter with the door closed and the lights off.
How Much Does It Cost to Replace a Garage Door Seal?
DIY materials typically run $20 to $80 for a bottom seal and $15 to $40 for perimeter seals, while full professional installation of all garage door weatherstripping commonly falls between $100 and $300. Costs rise with double-wide doors, premium materials, or retainer repairs needed before the new seal goes in.