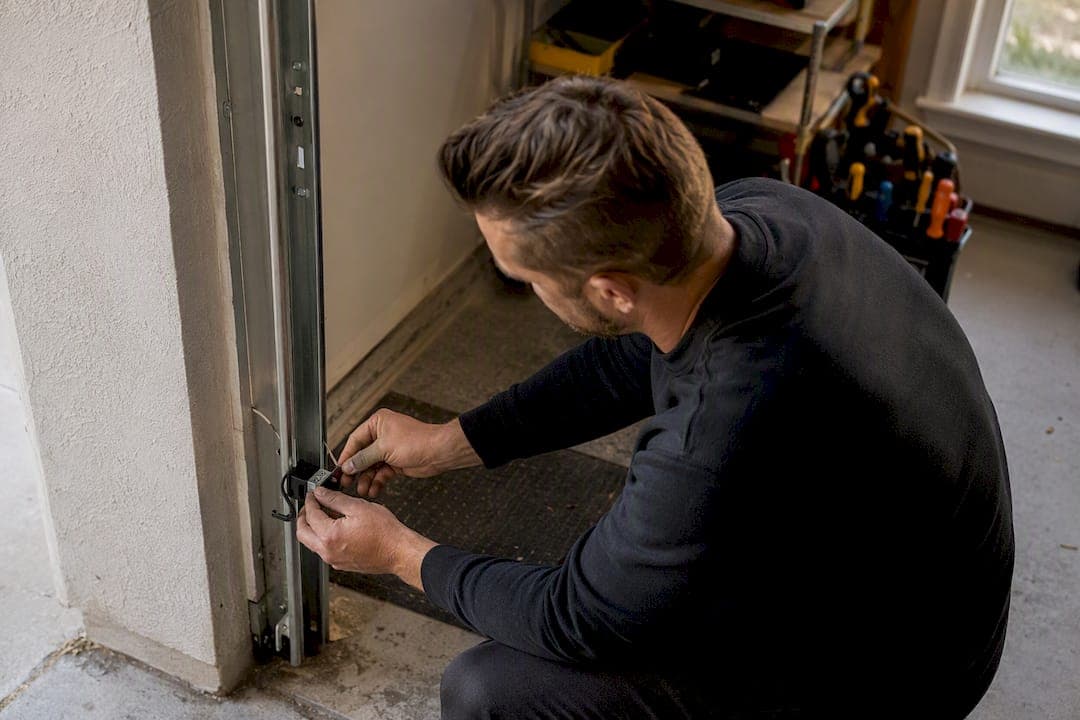
Most of the time, a garage door that won't close is being stopped by a blocked or misaligned safety sensor, not a broken opener. Check the small LED lights on both sensor eyes near the floor first. If they're not glowing steady, that's your answer. If instead you spot a snapped spring, a frayed cable, or a door hanging crooked on its track, stop immediately and call a professional.
TL;DR:
- Most garage doors that won't close are stopped by misaligned or dirty safety sensors, not a faulty opener, and checking their LED indicators is the first troubleshooting step.
- Sensor issues often cause the door to reverse immediately or not close at all, with diagnostic flash patterns in openers providing quick guidance.
- Problems with remotes or wall buttons usually stem from dead batteries, lock modes, or pairing issues, and can be resolved through simple resets or adjustments.
- Mechanical issues like bent tracks, seized rollers, or broken springs require physical inspection, while imbalanced springs can feel unusually heavy and need professional repair.
- Serious damage such as broken springs, frayed cables, or a door off track demands stopping DIY efforts and hiring a licensed technician to avoid injury or further damage.
Table of Contents
- Why Is My Garage Door Not Closing? Common Causes Ranked
- How to Troubleshoot a Garage Door That Won't Close
- What to Do If Your Garage Door Freezes Shut or Won't Close Safely
- When to Call a Garage Door Repair Technician
- What a Trusted Local Repair Team Gets Right
- Get Your Garage Door Fixed Today
- Sources
- FAQ
- A Straight Answer on "Just Force It Closed"
Why Is My Garage Door Not Closing? Common Causes Ranked
Field data backs up what most technicians will tell you on a service call: safety sensors are the culprit in the majority of "garage door not closing" complaints, according to The Garage Guide's breakdown of ten common causes. Everything else, remotes, tracks, springs, opener faults, splits the remaining share. That's good news, because it means the fix is usually cheap and fast, not a full opener replacement.
Here's how to recognize each cause by its symptoms, ranked from most to least likely.
- Photo-eye sensors: The door won't close at all, or it starts down and immediately reverses. Look at the small LED on each sensor bracket. A steady light on both sides means alignment is good; a flickering or dark LED points to dirt, sun glare, a knocked bracket, or a wiring fault. Many openers flash their indicator light 10 times in a row when this is the problem. That code is a built-in diagnostic required under UL 325, the federal safety standard for automatic garage door openers, which has mandated reversing sensors on every opener made since 1993.
- Remote or wall control issues: The wall button works but the remote doesn't (or vice versa). Common causes are a dead remote battery, an accidentally engaged LOCK or vacation mode, or a remote that's lost its pairing after a power blip.
- Travel-limit and force settings: The door closes partway, then reverses back up on its own, even with a clear sensor path and nothing in the way. This usually means the opener's internal limit or force settings have drifted, often after a storm, a manual adjustment, or years without a tune-up.
- Tracks, rollers, or obstructions: The door stalls, jerks, or binds at the same spot every time. Look for dented track sections, debris buildup, or a roller that's seized in its bracket.
- Springs and cables: You hear a loud bang before the trouble starts, the door feels unusually heavy when moved by hand, or you can see a gap in a coiled torsion spring above the door. A frayed or slack cable near the bottom bracket is another red flag.
- Opener internal faults: The motor runs (you hear humming) but the door doesn't move, or moves only a few inches. This often means a stripped drive gear, a disconnected trolley, or in rarer cases a failing logic board.
An insight from Chamberlain Group's own support documentation notes something worth repeating here: homeowners almost always blame the motor first, when the actual fault sits in a peripheral part, sensors, wiring, or a binding track. That single assumption sends a lot of people shopping for a new opener when a $20 sensor fix would have solved it.
How to Troubleshoot a Garage Door That Won't Close
Work through these steps in order. They're arranged from the fastest, safest fixes to the ones that require more mechanical comfort. Stop at any point where something feels dangerous.
- Check the sensor LEDs first. Stand at each sensor bracket, usually mounted 4 to 6 inches off the garage floor on either side of the track. Both LEDs should glow solid, not blinking, not dark. Wipe both lenses with a soft cloth. Sweep the floor between them for anything blocking the beam, including a stray broom handle or a garden hose. If the LEDs still won't hold steady, gently loosen the sensor's wing nut and nudge it until both lights lock on.
- Rule out sun glare. Late-afternoon sun can wash out a receiving sensor's LED even when the wiring and alignment are fine. A small cardboard shield taped above the sensor, angled to block direct light, often fixes this without touching anything electrical.
- Test wall button versus remote. If the wall control closes the door but the remote doesn't, swap the remote battery. Then check that LOCK or vacation mode isn't engaged on the wall console, that's a mode designed to disable remotes on purpose. If neither works, unplug the opener for 30 seconds and plug it back in to force a reset.
- Inspect the tracks and rollers. Walk the full length of both tracks looking for dents, gaps, or built-up grime; this guide to adjusting sliding glass doors for a smooth glide can help with track and roller maintenance. Clear obvious debris by hand. If a roller looks dry or sticky, a light silicone spray works on nylon rollers; never pack heavy grease onto rollers with sealed bearings, since it just attracts more grit and wears them out faster.
- Run the manual balance test. With the door fully closed, pull the emergency release cord to disengage the trolley, then lift the door by hand to about waist height. A properly balanced door should stay in place or drift down only slightly. According to Chamberlain Group's balance-test guidance, if it slams down or feels far heavier than expected, the springs are out of balance or broken. Do not reconnect the opener or attempt to force the door closed. Call a professional.
- Check the bottom seal and threshold. Cold weather and ice buildup can glue the rubber weatherseal to the concrete, especially after a freeze-thaw cycle. This shows up often as a frozen garage door seal during Loveland winter garage door problems, when overnight temperatures dip and melted snow refreezes under the door. Clear ice with warm water rather than force, and check that the seal compresses evenly across the full width once it's free.
- Adjust travel limits and force settings carefully. If the sensors, remote, and rollers all check out but the door still reverses partway, the opener's limit or force setting has likely drifted. Chamberlain's own troubleshooting page recommends small adjustments, a quarter turn or one click at a time, testing the door after each change. Overcorrecting the force setting can mask a real obstruction problem and create a pinch hazard, so professionals typically prefer to calibrate this by hand rather than guess.
Pro Tip: Keep a small notebook or phone note of exactly what the opener's light does, how many flashes, steady versus blinking, before you touch anything. That pattern is the fastest way for a technician to diagnose the problem over the phone instead of guessing on-site.
- Stop if the motor runs but the door won't move. A humming or grinding sound with no door movement usually means a stripped drive gear or a trolley that's popped off the chain or belt. Cycling the opener again only grinds the gear down further. Turn it off and schedule service.
- Know the safe emergency-close procedure. If you need the door down right now and the opener won't cooperate, pull the red emergency release cord (usually near the top of the door, close to the trolley) and lower the door by hand. If the springs are intact, lowering the door manually typically feels manageable. If a spring is broken, the door can become very heavy, which is exactly why you should never attempt this alone if you already noticed a broken spring or hanging cable.
What to Do If Your Garage Door Freezes Shut or Won't Close Safely
Some signs mean the checklist above stops applying. A visibly broken torsion or extension spring, a frayed or slack cable, a door hanging off one side of its track, or a loud bang you heard right before the trouble started are all signals to stop touching the door yourself.
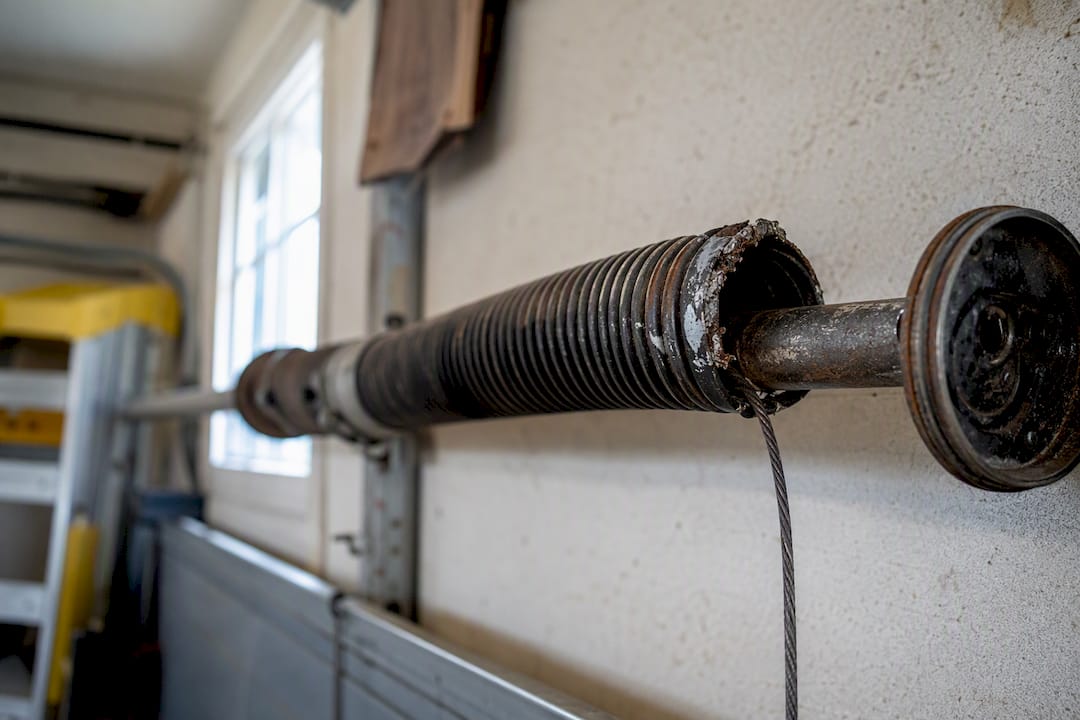
Springs store enormous tension to counterbalance a door that can weigh hundreds of pounds. When one lets go under load, or when a homeowner attempts to adjust or replace one without the right tools, the result can be serious injury, broken fingers, facial cuts, even worse. This isn't a job for a wrench and good intentions.
If you spot any of these signs: stop cycling the opener immediately, keep people and pets clear of the door, and only use the emergency release if you're ready to lower the door carefully with a second person helping. Do not attempt spring or cable repair yourself.
By the Numbers: Every opener sold in the U.S. since 1993 must meet UL 325's reversing-sensor requirement, and most modern openers signal a sensor fault with a distinctive 10-flash pattern on the wall control or opener light, one of the clearest built-in diagnostics homeowners can read themselves.
When to Call a Garage Door Repair Technician
Some fixes cross the line from DIY-safe to professional-only. Call a technician if you find a broken spring, a frayed or disconnected cable, a door sitting off its track, a stripped drive gear, or an opener that keeps throwing the same fault code no matter how many resets you try.
Costs vary by issue, but here's a general range to expect:
- Diagnostic or service call: typically $75 to $150
- Spring replacement: typically $150 to $300
- Sensor replacement: typically $15 to $50
- Logic board replacement: typically $60 to $120
A technician arriving on-site will check sensor wiring and alignment, inspect spring condition and cable integrity, confirm track alignment, and run the opener's internal diagnostics, often catching a second developing issue you hadn't noticed yet. Having your opener's model number and a phone photo of the problem ready speeds up the visit considerably. If you've already noticed the door creeping toward a full track derailment, that's worth mentioning up front too. Before booking, ask about warranty coverage, whether the estimate is firm before work begins, and same-day availability, all reasonable questions for any garage door service call.
What a Trusted Local Repair Team Gets Right
Most "garage door won't close" calls we see start with a homeowner assuming the worst, a dead opener, a total replacement, when the real fix is a sensor wipe-down or a limit adjustment. Mike's Garage Door Repair completes 90% of repairs the same day, because most causes really are that fast to diagnose once you know where to look.
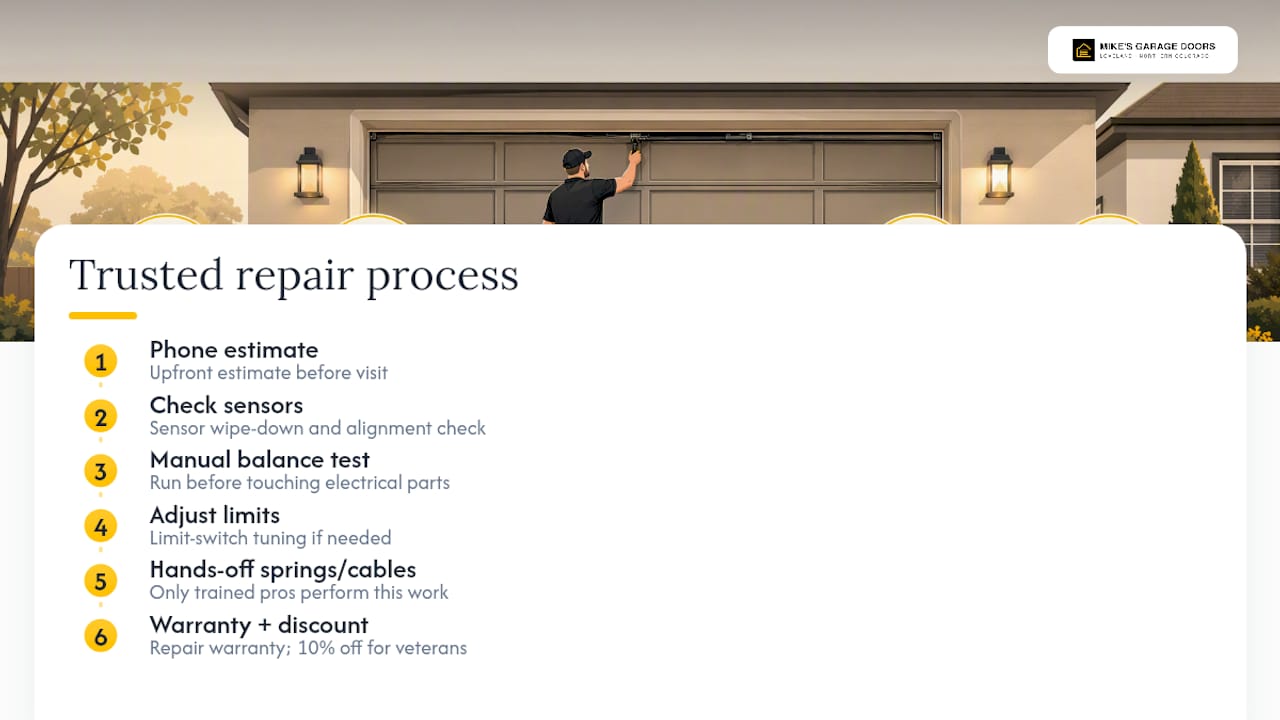
Every estimate is given upfront over the phone before a technician sets foot on the property, no surprise charges after the fact. Our technicians check sensors first, run the manual balance test before touching anything electrical, and treat spring and cable work as a hands-off job for trained professionals only. Every repair carries a warranty, and veterans receive a 10% discount as a standing policy, not a promotion.
Get Your Garage Door Fixed Today
If you've worked through the sensor checks, the remote reset, and the roller inspection and the door still won't close, or you've spotted a warning sign like a broken spring or a door leaning off its track, it's time to bring in someone who does this every day. Mikes garage doors Loveland Colorado is built around exactly that moment: a homeowner who's done the safe DIY steps and now needs a straight answer, not a runaround.

What sets this apart from calling around for quotes is the upfront estimate given over the phone, before anyone shows up, so you know the cost before committing. Technicians carry the parts for the most common fixes, sensors, cables, springs, on the truck, which is part of why 90% of jobs close out the same day they're called in. Veterans get 10% off, and every repair comes backed by warranty coverage.
Head to the garage door services page to see the full range of repair, spring replacement, and opener work covered across Northern Colorado, and get a phone estimate before you decide anything.
Sources
- U.S. Consumer Product Safety Commission: Safety rules for automatic garage door openers (UL 325 adoption)
- Chamberlain Group support: Door travels only a little way then reverses
- The Garage Guide: Garage door won't close? 10 causes and how to fix each one
FAQ
Why Won't My Garage Door Close When There's Nothing in the Way?
A blocked path isn't the only thing that trips the safety sensors. Dirt on the lens, direct sunlight hitting the receiver, a slightly bumped bracket, or a loose wire can all make the opener think something's blocking the door even when the path is clear.
How Do I Reset a Garage Door Sensor?
Wipe both sensor lenses clean, then loosen the wing nut on each bracket just enough to adjust the angle until both LEDs glow solid instead of blinking. If that doesn't hold, unplug the opener for 30 seconds to force a full reset before trying again.
Why Won't My Garage Door Close When I Press the Button?
Start by checking which control fails, wall button or remote, since that narrows the cause fast. A remote failure usually means a dead battery or an engaged LOCK mode, while a wall button failure that also affects the remote points back to the sensors or the opener itself.
Why Is My Garage Door Not Closing Even Though It's Aligned?
If both sensor LEDs are steady and the path is clear, the problem has likely shifted to the opener's travel-limit or force settings, which can drift out of calibration over time. This calls for small, careful adjustments per the opener manufacturer's guidance, or a quick call to a technician if you're not comfortable making them yourself.
A Straight Answer on "Just Force It Closed"
Every year, someone tries to muscle a stuck garage door shut, jamming a screwdriver against a sensor, taping over a blinking LED, or holding the wall button down against resistance the opener is clearly fighting. It usually works, once. That's the part nobody warns you about: bypassing a safety reversal system doesn't fail loudly the first time. It fails the second or third time, often when a kid's bike or a pet is in the door's path instead of nothing at all.
The sensor system exists because garage doors are heavy enough to cause real injury, and the entire point of UL 325 was to stop the era when doors closed on whatever happened to be underneath them. I'd argue the more useful mindset isn't "how do I get this door closed right now" but "why is the opener refusing to close it," because in the overwhelming majority of cases that refusal is the system doing exactly what it's supposed to do. The five-minute checklist, sensors, remote, tracks, balance test, exists precisely so you never have to choose between a working door and a safe one. When the checklist runs out and you're staring at a bent track or a snapped spring, that's not a moment to get creative. That's the moment the job stops being yours.
— Eddie