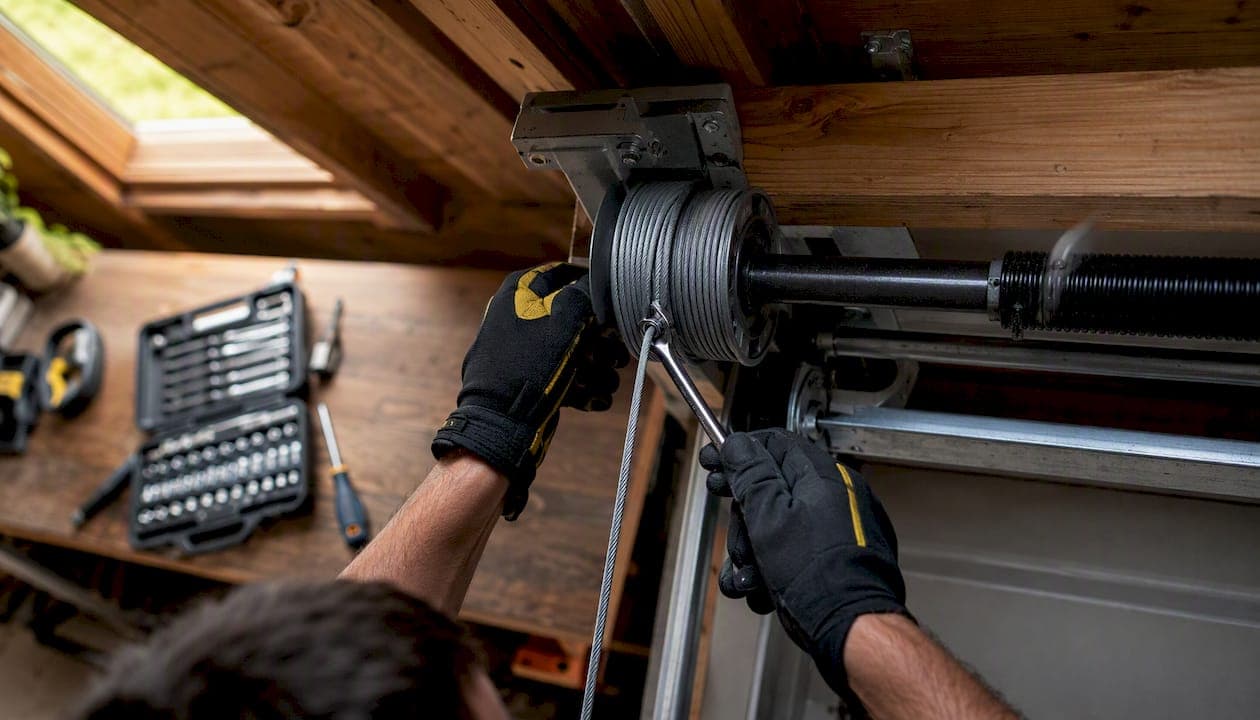
You can tighten loose garage door cables yourself in some situations, but the line between a safe DIY fix and a dangerous one is sharper than most homeowners expect. If the cable has simply slipped slightly on the drum or a set-screw has drifted loose, a confident homeowner with basic tools can re-seat it. If you see fraying, a broken spring, a cable pooled on the floor, or the door hanging at an angle, stop. Those are professional repairs. The single most important first step: disconnect your opener and visually inspect the full cable run from a safe distance before touching anything.
Key Takeaways
Tightening loose garage door cables is safe for minor drum and set-screw issues, but any spring winding, frayed cable, or persistent imbalance requires a professional repair.
| Point | Details |
|---|---|
| Inspect before touching | Check for fraying, broken springs, and door angle before attempting any adjustment. |
| Set-screw tightening method | Tighten hand-tight, then add 1/2 to 3/4 turn; never over-torque the drum set-screw. |
| Balance is the success test | Disconnect the opener and lift the door to waist height; a balanced door holds in place. |
| Replace both cables together | When one cable is worn or broken, replace both; the partner cable is usually near failure too. |
| Mikes garage doors Loveland colorado | Offers same-day cable, spring, and drum repair in Northern Colorado with upfront phone estimates and warranty coverage. |
Table of Contents
- What to check before you tighten loose garage door cables
- Why do garage door cables go loose in the first place?
- Tools and safety gear you need before starting
- How to tighten or re-seat a cable on a torsion-spring system
- How to tighten or reattach cables on extension-spring systems
- How tight should garage door cables be?
- Troubleshooting cables that keep slipping, fraying, or unwinding
- When should you call a professional for cable repair?
- How to safely release and re-tension springs before a cable adjustment
- Reliable cable and spring repair in Loveland, Colorado
- Sources
- FAQ
What to check before you tighten loose garage door cables
Safety comes first, and that means a quick checklist before any tools come out.
Disconnect and clear the area first:
- Unplug the opener or flip the circuit breaker for the garage door circuit.
- Move vehicles and people out of the garage.
- Never work under a door that is not secured open.
Visual checks to do from a safe distance:
- Look for fraying, kinks, or "shaggy" strands on either cable. According to Clopay's replacement guidance, visible fraying or splitting means the cable needs replacement, not tightening.
- Check whether the door hangs level. A door that tilts to one side signals a broken spring or a cable that has fully slipped off the drum.
- Look at the floor near the bottom bracket. Cable coiled on the floor means a spring has likely snapped.
- Inspect the torsion spring (the horizontal bar above the door) for a visible gap, which is the clearest sign of a break.
What you must not do:
- Never loosen the bottom brackets. They are under extreme cable tension and can snap outward with enough force to cause serious injury.
- Never use a screwdriver, pipe, or any improvised tool as a winding bar for torsion springs.
- Never operate a door when one cable is broken or off the drum.
Pro Tip: To secure an open door safely without touching the springs, clamp a pair of locking pliers (vice grips) onto the vertical track just below the bottom roller. This prevents the door from dropping while you work.
Why do garage door cables go loose in the first place?
Understanding the root cause tells you whether tightening will actually fix the problem or just delay a bigger repair.
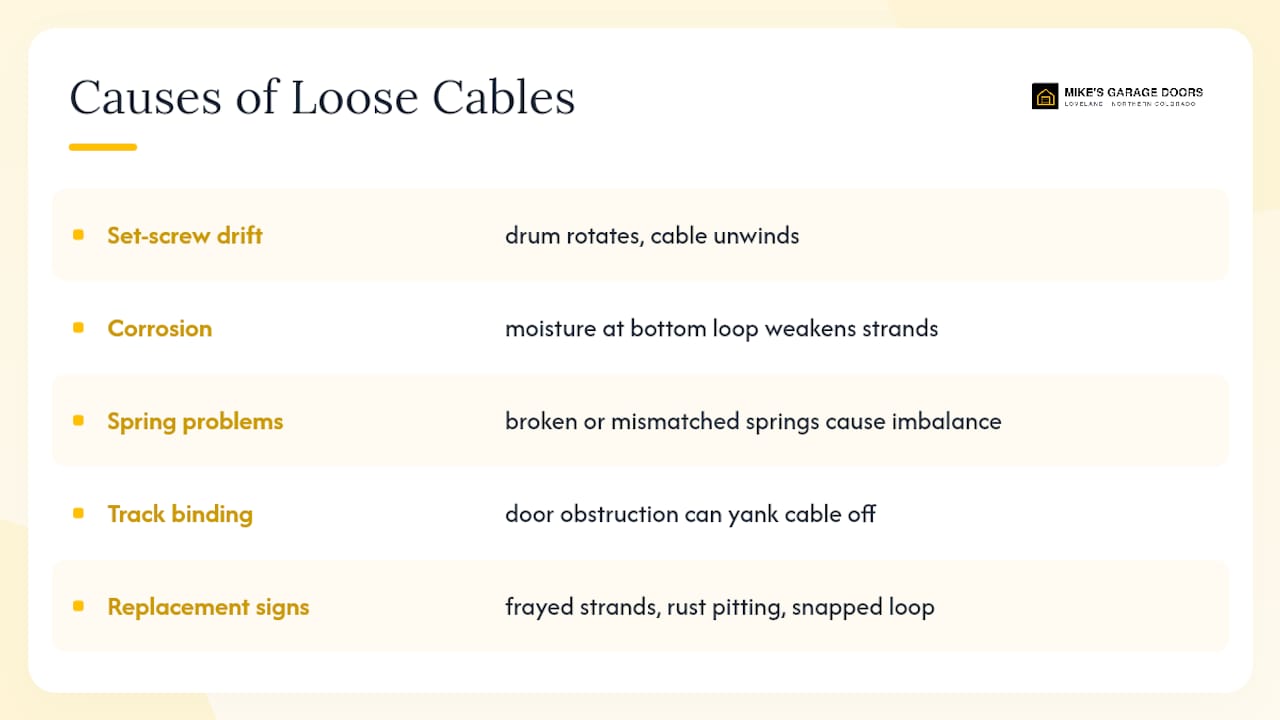
The two most common reasons cables come off the drums are slack in the cable and a broken cable, according to Garage Door Guide's drum failure analysis. Slack builds up when a set-screw on the drum drifts loose over time, allowing the drum to rotate slightly and let the cable unwind. Corrosion is another culprit. It tends to attack the cable near the bottom loop, where moisture collects, weakening the wire strands from the inside out before any visible fraying appears on the surface.
Spring problems are a major driver too. A broken or mismatched spring changes the load balance across the door, which shifts cable tension unevenly. On torsion systems, this often shows up as slack at the top of travel. On extension systems, a broken spring on one side lets that cable go completely limp.
If a cable goes slack only when the door is fully open, that usually signals an imbalance — drum drift, track bias, or a spring mismatch — rather than a simple loose cable. Tightening alone can make the problem worse by pushing the imbalance to the opposite side.
Track binding or a door that has been closed on an obstruction (a box, a bike, even a thick layer of ice) can also yank a cable off the drum in a single cycle. Worn drum grooves are a less obvious cause: once the groove that guides the cable wears smooth, the cable walks off even when tension is correct.
When the cause points to replacement, not tightening: frayed strands, rust pitting, repeated slip-offs after correct re-seating, or a cable that has snapped at the bottom loop all mean the cable has reached the end of its service life.
Tools and safety gear you need before starting
Get these together before you touch the door:
- Locking pliers (vice grips): for securing the door open on the track
- Ratchet or wrench set: for set-screws on the drum (typically 7/16" or 1/2")
- Sturdy step ladder: to reach the drums safely
- Safety glasses: non-negotiable; cable under tension can snap without warning
- Leather work gloves: protect against sharp wire ends
- A helper: someone to watch the door and hand you tools
If any spring work becomes necessary, you also need two proper winding bars that fit the winding cone on your specific spring. A screwdriver or a piece of rebar is not a substitute. Winding-bar technique is the single most dangerous step in torsion spring work, and improvised tools are the leading cause of injuries.
Prep steps before you begin:
- Disconnect the opener (unplug it or flip the breaker).
- Secure the door fully open with locking pliers on the track below the bottom roller.
- Clear the floor of clutter so you have a clean exit path.
- Keep your phone nearby.
Stop immediately if any step requires you to adjust spring tension. That is a separate, high-risk task covered later in this article.
How to tighten or re-seat a cable on a torsion-spring system
Minor drum set-screw adjustments and re-seating an untangled cable are within reach for a confident homeowner. Any spring winding is not. Keep that line clear.
WikiHow's cable adjustment guide outlines a consistent re-seating process that pros and experienced DIYers follow:
- Disconnect the opener and unplug it from the outlet.
- Secure the door open by clamping locking pliers on the vertical track just below the bottom roller on both sides.
- Inspect the drums. Look at the cable groove. If the cable has simply unwound one or two wraps, re-seating is possible. If the drum groove is worn smooth or cracked, replace the drum.
- Loosen the set-screw slightly on the drum where the cable has slipped. Use your ratchet. Do not remove the screw entirely.
- Pull the cable taut by hand and wind it back into the drum groove, working from the bottom up. Keep even tension as you wind.
- Rotate the drum just enough to take up the remaining slack, then hold it in position.
- Re-tighten the set-screw. Per Garage Door Guide's set-screw guidance, tighten hand-tight first, then add an additional 1/2 to 3/4 turn. Do not over-torque.
- Remove the locking pliers and lower the door manually.
- Test door balance (see the balance check section below).
- Reconnect the opener and run two full open/close cycles. Watch the cables at the drums during both cycles.
Never release spring tension during this process. If the cable re-seats but the door still feels heavy or uneven, the spring is the problem, not the cable. Stop and call a technician.
Safety warnings at high-risk steps: At step 6, keep your hands clear of the drum's rotation arc. At step 7, stand to the side of the spring, never directly in front of the winding cone. DIY Stack Exchange homeowner reports confirm that clamping the torsion bar and track carefully can work, but safety glasses and leather gloves are required throughout.
Pro Tip: After re-tightening, run the door through five full cycles and then re-check the set-screws by hand. New cable wraps can settle slightly, and a screw that felt tight after step 7 sometimes needs a small additional snug after a few cycles.
How to tighten or reattach cables on extension-spring systems
Extension-spring cable work is generally lower risk than torsion spring winding, but it still demands care. The key difference: extension springs relax when the door is fully open, which means opening the door removes most of the stored energy before you start.
- Open the door fully and secure it with locking pliers on the track below the bottom roller.
- Inspect the safety cables running through the center of each extension spring. If these are missing, do not proceed. A spring without a safety cable can become a projectile if it snaps.
- Locate the cable routing. On extension systems, the lift cable runs from the bottom bracket, up and over a pulley at the top of the track, and back to an anchor point. Re-route any cable that has slipped off the pulley.
- Re-seat the cable in the pulley groove and confirm it sits flat, not twisted.
- Check the bottom bracket anchor bolt and tighten if loose.
- Lower the door slowly by hand and watch the cable track through the pulley without binding.
- Run two manual cycles before reconnecting the opener.
If the extension spring itself is broken, or if the safety cable is missing, stop here and call a technician. A broken extension spring with no safety cable is a serious hazard.
Pro Tip: On extension systems, compare the cable angle on both sides when the door is closed. Both cables should run parallel to the track at the same angle. A cable that angles inward or outward usually means the pulley bracket has shifted.
How tight should garage door cables be?
Cables should be taut but not over-stretched. The right test is not about measuring pounds of tension; it is about door balance.
How to check balance:
- Disconnect the opener by pulling the red emergency release cord.
- Lift the door manually to about waist height and let go.
- A balanced door stays in place. A door that drops or shoots up has a spring tension problem, not just a cable problem.
- With the door closed, look at both cables. They should show equal, slight tension with no visible sag on either side.
- Compare cable tension side-to-side by pressing each cable gently with one finger. Both should feel equally firm.
Overtightening is a real risk. Winding too much cable onto a drum without adjusting spring tension puts asymmetric load on the spring, which accelerates wear and can cause the cable to snap under the added stress. Check the spring tension adjustment guide if the balance test reveals a spring issue.
Pro Tip: Re-check balance after the first 10 cycles following any cable adjustment. Cables and drums settle into position over the first few uses, and a door that passed the initial balance test can drift slightly.
Troubleshooting cables that keep slipping, fraying, or unwinding
Repeat failures are a signal the system needs more than a re-tightening.
- Worn drum grooves: If the cable walks off after correct re-seating, the groove is likely worn smooth. Replace the drum.
- Loose set-screws that won't hold: The drum bore may be worn. A drum that spins on the shaft even with a tight set-screw needs replacement.
- Mismatched spring torque: A spring that is too weak for the door weight will let cables go slack repeatedly. This requires a spring replacement, not a cable fix.
- Track binding or misalignment: A door that drags on one side puts uneven load on the cables. Check the track gap (should be consistent top to bottom) and look for bent sections.
- Corroded or frayed cable: Replace both cables at once. Integrity Garage Doors' service standard is to replace both lift cables together, because one failing cable usually means the other is close behind.
Decision flow: Re-tighten if the cable slipped once and the drum and spring are in good shape. Replace the cable if you see fraying, rust pitting, or a second slip-off. Call for a full system inspection if the door is unbalanced, the spring looks worn, or the problem has repeated more than twice.
Pro Tip: Run your fingers along the cable length (with gloves on and the door secured) and feel for stiff spots, kinks, or rough texture. Any of those sensations means the cable is compromised internally, even if it looks intact from a distance.
When should you call a professional for cable repair?
Call a pro immediately if you see any of these:
- Fraying, splitting, or shaggy strands on either cable
- One cable completely off the drum or broken at the bottom loop
- A visible gap in the torsion spring (broken spring)
- Cable coiled on the floor
- Door that remains unbalanced after a correct re-seating attempt
- Any situation where spring winding is required
What a technician will do on a cable repair call:
- Full system inspection: springs, drums, tracks, rollers, and bottom brackets
- Release and re-tension torsion springs using two winding bars and controlled procedures
- Replace both lift cables as a matched pair
- Inspect and replace drums if grooves are worn
- Verify track alignment and test opener auto-reverse
Typical cost ranges for cable repair in Northern Colorado run from roughly $150–$250 for a straightforward cable replacement and re-tensioning to $300–$500 or more when a spring replacement is also needed. These are approximate figures; actual costs depend on door size, spring type, and parts. Ask for an upfront phone estimate before booking.
Pro Tip: When you call, tell the technician whether one or both cables are affected, whether you heard a loud bang (spring break), and whether the door is stuck open or closed. That information lets them arrive with the right parts and give you an accurate phone estimate.
How to safely release and re-tension springs before a cable adjustment
Releasing and re-tensioning torsion springs is the most dangerous step in any garage door repair. Spectrum Repair Services' field guidance is direct: professionals use two winding bars, lock the torsion shaft, and maintain a body position outside the spring's arc at all times. The stored energy in a torsion spring is enough to cause severe injury if a winding bar slips.
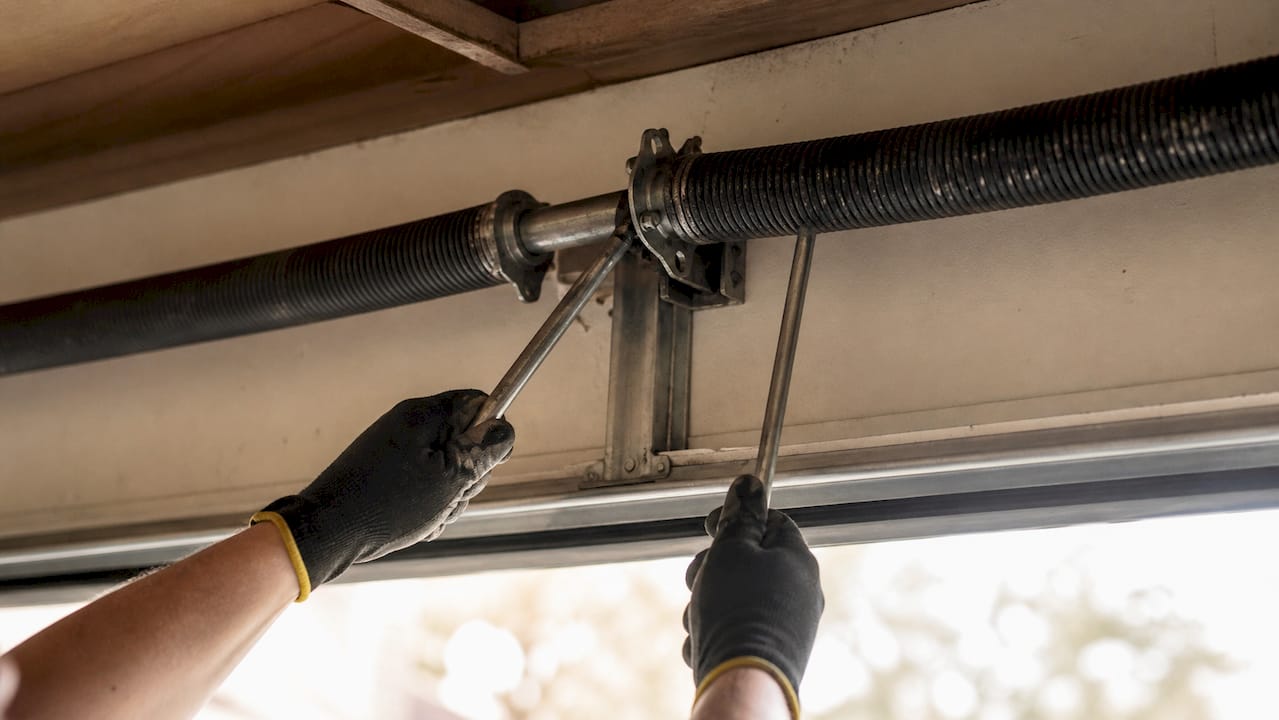
For homeowners, the practical guidance is this: if your cable re-seating requires you to release spring tension first, that job belongs to a technician. The spring repair safety guide explains why this step specifically carries risks that basic DIY tools and experience cannot adequately manage.
If a technician has confirmed the spring tension is correct and only the cable needs re-seating, you can follow the torsion steps above without touching the spring at all. The moment the spring needs to be wound or unwound, stop and schedule a service call.
What the pros at Mikes garage doors Loveland colorado have seen
Most homeowners who call us after a DIY attempt made the same mistake: they tightened the cable without checking whether the spring was the actual problem. The door worked for a day or two, then the cable slipped again, and by that point the drum had extra wear from the misaligned tension. A five-minute inspection at the start would have saved them the second call.
Safety-first is not a slogan for us. We carry proper winding bars, calibrated torque specs for the springs we install, and the experience to spot a drum that is about to fail before it does. If you are in Loveland or anywhere in Northern Colorado and the job has moved past a simple set-screw snug, give us a call before it gets bigger.
Reliable cable and spring repair in Loveland, Colorado
When a cable adjustment turns into a spring problem, or when you just want the job done right the first time, Mikes garage doors Loveland colorado handles it all: cable replacement, spring calibration, drum replacement, tune-ups, and emergency repairs for both residential and commercial doors across Northern Colorado.

Ninety percent of repairs are completed the same day. You get a transparent, upfront estimate over the phone before anyone shows up, so there are no surprises on the invoice. Veterans receive a 10% discount. Every repair comes backed by a warranty, so if something is not right, we come back.
To book a service call, visit the garage door services page or call directly. Have your door type (torsion or extension spring), the symptoms you are seeing, and whether a cable is visibly broken ready to share. That gets you an accurate estimate on the first call.
Sources
The sources below back the guidance in this article. Each covers a specific aspect of cable repair, safety, or system diagnosis.
- Cable broke off drums — Garage Door Guide
- Garage door cable replacement — Clopay
- Garage door cable loose when open? What it means — AGSmart Garage
- Easy ways to adjust garage door cables — WikiHow
- How to tighten garage door cables safely — Gold Coast Garage Door Repair
- Garage Door Cable Repair — Integrity Garage Doors
- Garage door cable repair full instructions — Spectrum Repair Services
- Garage door cable loose when open? — DIY Stack Exchange
FAQ
How do you tighten a loose garage door cable?
Disconnect the opener, secure the door open with locking pliers on the track, loosen the drum set-screw slightly, wind the cable back into the drum groove, and retighten the set-screw hand-tight plus 1/2 to 3/4 turn. Test door balance before reconnecting the opener.
How tight should garage door cables be?
Cables should be taut with no visible sag, and the door should hold steady at waist height when the opener is disconnected. Equal tension on both sides and a door that stays at any mid-position are the practical signs of correct adjustment.
Why do garage door cables keep unwinding?
Repeated unwinding usually means a worn drum groove, a set-screw that will not hold, or a spring that is too weak for the door weight. If the cable slips off more than once after correct re-seating, the drum or spring needs replacement, not just another tightening.
How do you secure garage door wires safely?
Re-route the cable into the drum groove or pulley, confirm it sits flat without twisting, and tighten the anchor or set-screw. Always secure the door open with locking pliers before touching any cable, and wear safety glasses and leather gloves throughout.