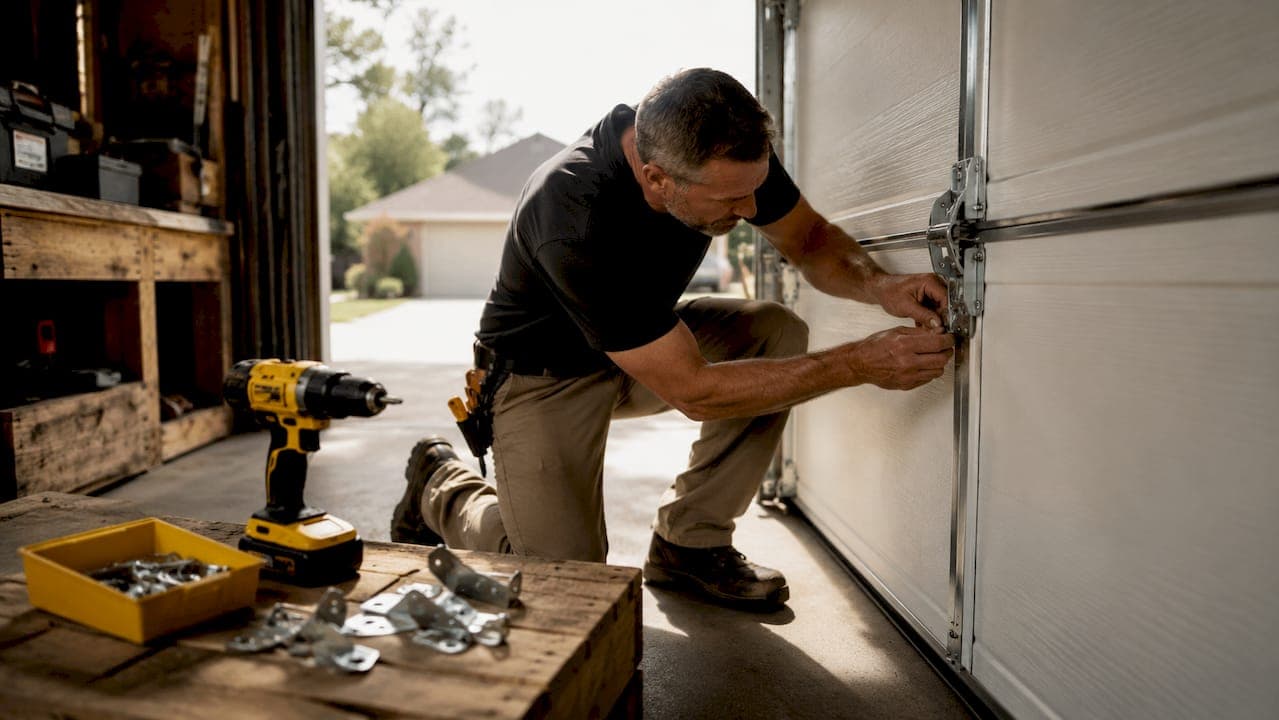
Garage door panel hinges are the metal joints that connect each panel of your door, allowing them to pivot smoothly every time the door opens or closes. Without functioning hinges, a sectional door cannot flex through its curved track. Industry standards recommend replacing hinges every 15–20 years, though Colorado's temperature swings and moisture can shorten that window. Whether you're hearing grinding noises, seeing a sagging panel, or just doing a routine check, understanding how these parts work puts you in control of your door's health and safety.
What are garage door panel hinges and how do you identify them?
Garage door panel hinges are stamped steel brackets that bolt between adjacent panels and carry the rollers that ride inside the door track. The industry term for the full set is "sectional door hinges," though most homeowners and parts suppliers use the numbered hinge system to tell them apart.
Each hinge carries a number, typically #1 through #5, that tells you its vertical position on the door. The #1 hinge sits at the bottom joint, and the numbers increase as you move up. That number also encodes the hinge's offset, which is the distance between the roller stem hole and the panel mounting holes. Visually identical hinges can carry different offsets, so using the wrong number causes binding or jerky movement even if the hinge physically fits.
There are two functional categories to know:
- Center hinges bolt between two panels at the middle of the door width. They flex the joint but do not carry a roller.
- End hinges (also called roller-carrying hinges) sit at the left and right edges of each panel joint. They hold the roller stem that rides in the vertical and curved track sections.
Steel gauge matters as much as the number stamp. Shifting from 14-gauge to 11-gauge steel nearly doubles yield strength, and zinc coating quality directly affects rust resistance. For Northern Colorado homeowners dealing with road salt and freeze-thaw cycles, heavier gauge with a quality zinc coat is worth the small price difference. Standard hinges cost $4 to $12 each, so upgrading gauge on a full door replacement adds very little to the total bill.
Pro Tip: Check the hinge stamp before you order replacements. The number is usually pressed into the metal face. If the stamp is worn, count the panel joints from the bottom to determine position.
How do you inspect hinges for damage?
A damaged hinge rarely fails all at once. It gives you warnings first, and catching them early prevents a minor repair from turning into a full panel replacement.
Visual signs are the most obvious starting point. Run your eyes along every hinge while the door is closed and fully lit. Look for:
- Cracks or fractures in the hinge plate, especially around the bolt holes
- Rust that has eaten through the metal rather than sitting on the surface
- Bent plates that no longer sit flat against the panel
- Worn or elongated pin holes where the hinge knuckle connects
- Stripped or pulled-out bolt holes in the panel itself
Audible signs come next. Squeaking at a specific point in the door's travel usually points to a dry or corroded hinge pin. Grinding or popping sounds suggest a roller is fighting a bent hinge rather than rolling freely through the track.
Functional signs are the most urgent. Uneven panel seams, knocked-out rollers, or visible cracks mean you should stop operating the door immediately. A cracked hinge under load can let a panel drop, which turns a 200-pound door into a falling hazard. Door shaking or binding at specific hinge points also signals urgent inspection.
Pro Tip: Open the door halfway and hold it there manually. If it drifts down on its own, the door is out of balance. An unbalanced door puts extra stress on every hinge and will keep destroying replacements until the balance issue is fixed.
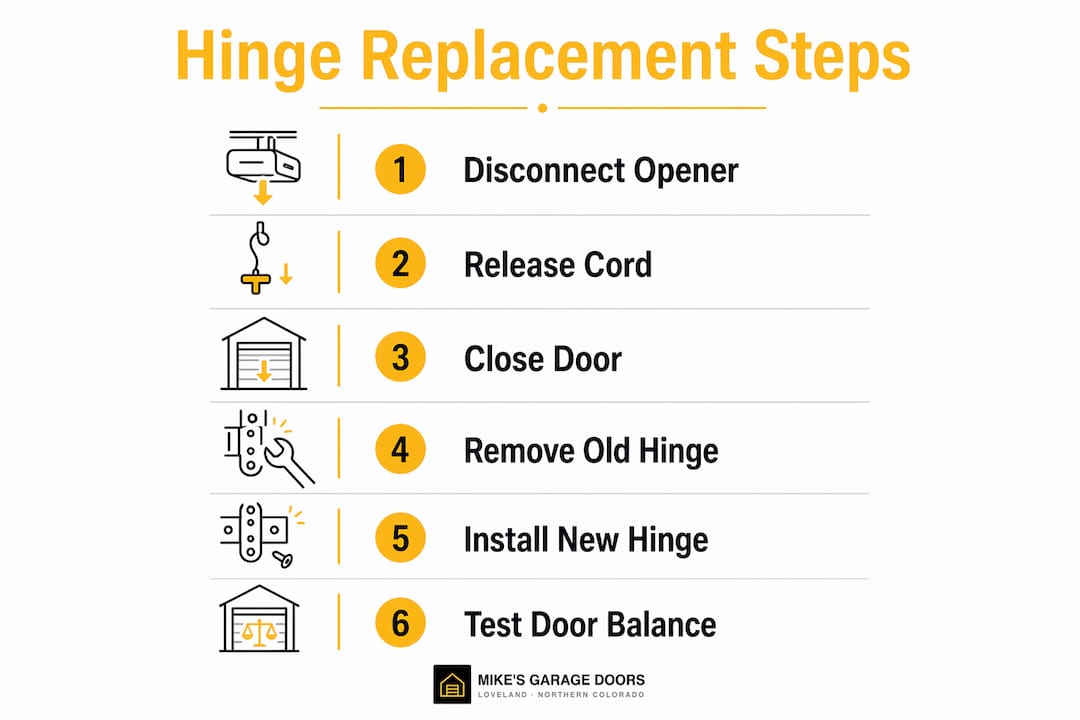
How to safely replace garage door panel hinges step by step
Safe hinge replacement follows a clear sequence. Skipping steps, especially the safety ones, is how minor repairs become emergency calls.
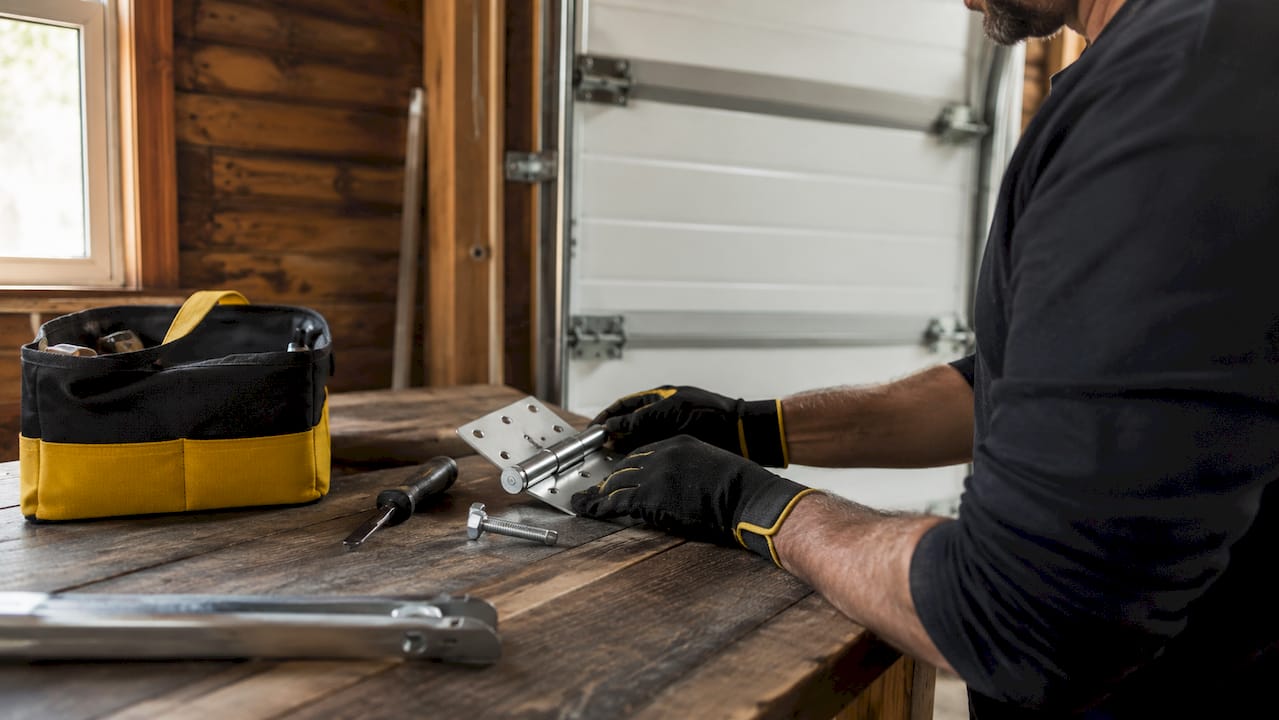
Before you touch a single bolt
Disconnect the opener and pull the red emergency release cord. Close the door fully so the panels rest on the floor and the springs carry no extra load. Clamp a pair of C-clamps to the vertical track just above the bottom roller on both sides. This keeps the door from moving if a panel shifts during the swap.
Gather your tools: a socket wrench set, two C-clamps, a sturdy ladder, a flat-head screwdriver, and a can of white lithium or silicone spray lubricant. Avoid WD-40 on hinges. It cleans well but does not lubricate long-term.
Replacing the hinge
- Position your ladder so you can reach the target hinge without leaning sideways.
- Loosen the carriage bolts holding the hinge to both panels. Do not remove them yet.
- Replace one hinge at a time and clamp adjacent panels before removing any hardware. Pulling multiple hinges at once can buckle the door or drop a panel.
- Remove the old hinge completely and inspect the bolt holes in the panel. If holes are stripped or cracked, reinforce them with a backing plate before installing the new hinge.
- Align the new hinge so the roller stem hole faces the track side of the door. Thread the carriage bolts by hand first to confirm alignment.
- Tighten the bolts firmly but not so hard that you crush the panel skin. A snug, even torque on all four bolts is the goal.
- Spray lubricant on the hinge pin and roller stem before moving to the next hinge.
Pro Tip: Always check the hinge number on the replacement before installation. Mismatched hinge numbers cause binding and accelerated wear even when the bolt pattern looks identical.
When to call a professional
The #1 hinge and the bottom corner brackets sit in the high-tension zone where the lift cables attach. Removing a #1 hinge under cable tension is dangerous and has caused serious injuries. If your bottom panel or bottom-joint hinge needs work, call a technician. The 9 signs your door needs repair article from Mikes garage doors Loveland covers additional red flags that point to professional-level problems.
Maintenance tips to extend hinge life
Regular maintenance costs almost nothing and adds years to every hinge on your door.
- Lubricate every six months. Apply white lithium grease or silicone spray to each hinge pin and roller stem. Spring and fall are natural reminders since temperature changes stress metal joints.
- Check and tighten bolts twice a year. Vibration from daily operation loosens carriage bolts over time. A loose hinge rocks under load and enlarges the bolt holes, eventually requiring panel repair.
- Inspect for surface rust after wet seasons. Light rust wipes off with a dry cloth and a thin coat of lubricant. Deep rust that pits the metal means the hinge needs replacement before the next winter.
- Monitor door balance quarterly. Disconnect the opener, lift the door manually to waist height, and let go. A balanced door stays put. A door that drops or rises has a spring tension problem that will wear out hinges faster than normal use.
- Replace hinges in matched sets when one fails on an older door. If one hinge on a 15-year-old door cracks, the others are at the same wear stage. Replacing the full set at once saves a second service call within months.
Pro Tip: Keep a small bag of spare hinges in the correct numbers for your door. When you spot a crack during inspection, you can swap it the same day instead of waiting for a parts order.
Key Takeaways
Garage door panel hinges are the single most replaced hardware component on sectional doors, and matching the correct number, gauge, and position is what separates a smooth repair from a recurring problem.
| Point | Details |
|---|---|
| Match hinge numbers exactly | Each number encodes a specific offset; the wrong number causes binding even if the bolt pattern fits. |
| Stop the door if a hinge cracks | A cracked hinge under load can drop a panel; cease operation until the hinge is replaced. |
| Never DIY the #1 hinge | Bottom-joint hinges and corner brackets sit under cable tension and require professional removal. |
| Replace one hinge at a time | Removing multiple hinges simultaneously risks door buckling or panel collapse. |
| Lubricate and check bolts twice a year | Scheduled maintenance prevents corrosion and bolt loosening that accelerates hinge wear. |
What I've learned after years of hinge calls
The most common mistake I see on DIY hinge jobs is not the wrong tool or the skipped lubricant. It's the homeowner who grabs a hinge from the hardware store bin because it "looks the same." Visually identical hinges with different offset numbers will make your door bind within weeks, and most people blame the track or the opener before they ever look at the hinge stamp.
The second thing I'd push back on is the idea that hinge replacement is always a quick Saturday fix. Positions #2 through #4 are genuinely manageable for a careful DIYer with the right tools. But the moment you're near the bottom panel or the cable drum area, the risk profile changes completely. I've seen homeowners pull a bottom bracket thinking it was just a hinge, and the cable whips free with enough force to cause real injury. That's not a scare tactic. It's physics.
Checking door balance before and after any hinge work is the step most guides skip. Door balance is the root cause behind a lot of repeat hinge failures. If the springs are weak or misadjusted, the opener motor and the hinges absorb the extra load every single cycle. You can replace every hinge on the door and still be back to cracked metal in two years if the balance is off.
My honest advice: do the middle hinges yourself if you're comfortable with tools and patient enough to go one at a time. For anything near the bottom panel, or if you find stripped bolt holes in the panel wood, call a pro. The repair cost is almost always less than the emergency call after something goes wrong.
— Eddie
Garage door hinge help from Mikes garage doors Loveland
Hinge replacement is straightforward when the damage is limited to one or two mid-door joints. When the inspection turns up stripped panel holes, a cracked bottom bracket, or a door that won't balance after the swap, the job needs a trained set of hands.

Mikes garage doors Loveland handles hinge replacement as part of a full door inspection, checking balance, roller condition, and cable integrity in the same visit. Ninety percent of repairs are completed the same day, and every estimate is given upfront over the phone so there are no surprises. Veterans receive a 10% discount on all services. If your door is showing signs of hinge wear or panel damage, book a service call and get it handled right the first time.
FAQ
How much do garage door hinges cost to replace?
Standard garage door hinges cost $4 to $12 each. A full door set typically runs $30 to $80 in parts, with professional labor adding to the total depending on door size and condition.
How do I know which hinge number I need?
Count the panel joints from the bottom of the door. The first joint up from the floor uses a #1 hinge, the second uses a #2, and so on. The number is also stamped into the hinge face on most standard steel hinges.
Can I replace a garage door hinge myself?
Hinges at positions #2 through #4 are safe for careful DIY replacement when the door is closed and the opener is unplugged. The #1 hinge and bottom corner brackets sit under cable tension and should always be handled by a professional.
What causes garage door hinges to fail early?
Poor door balance is the leading cause of premature hinge failure. An unbalanced door forces hinges to absorb extra load on every cycle, accelerating wear far beyond the normal 15–20 year service life.
What lubricant should I use on garage door hinges?
White lithium grease or silicone spray are the correct choices for hinge pins and roller stems. Both hold up under temperature swings and do not attract dirt the way petroleum-based sprays do.