Your LiftMaster instruction manual is available free at support.chamberlaingroup.com — no shipping, no cost, just search your model number and download the PDF. Before you search, do one thing first: locate the model and serial number label on your opener's motor head. That single step determines whether you pull the right manual or waste an hour following instructions for the wrong unit. If you're in Northern Colorado and need a hand, Mikes garage doors Loveland colorado completes 90% of repairs the same day — so you're never stuck waiting.
Pro Tip: Photograph the model label before you climb down from the ladder. You'll need that number again when ordering parts or calling support.

Table of Contents
- How do you find the correct LiftMaster model number?
- What does a LiftMaster manual actually cover?
- Which manual tasks are safe for homeowners to try?
- When should you stop DIY and call a professional?
- How do you read LiftMaster LED flash codes?
- Does your LiftMaster support myQ Wi-Fi connectivity?
- What warranty and safety rules does the manual spell out?
- How do you download the manual and prepare for support?
- Key Takeaways
- What we see on the job every week
- Northern Colorado homeowners: here's how we can help
- FAQ
- Useful sources
How do you find the correct LiftMaster model number?
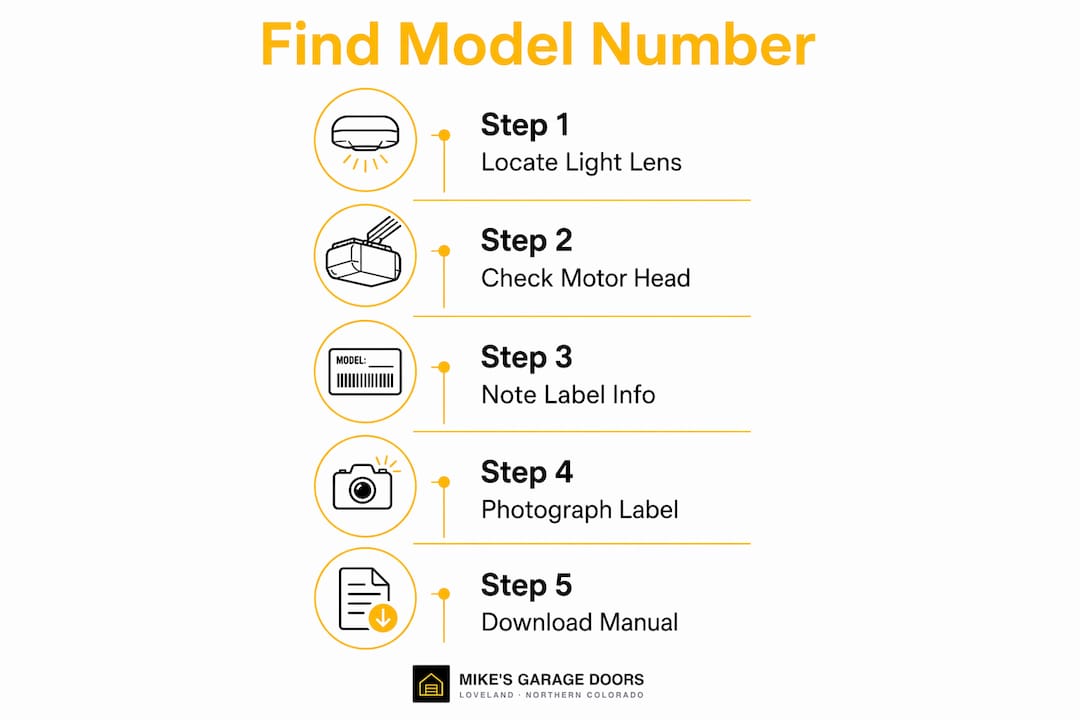
The model number label sits on the side of the motor head opposite the antenna, usually behind the light lens cover. On single-light units, check under the front lens. On two-light units, look beneath the left lens when you're facing the opener. If you see only a part number, flip to the other side of the housing — the model label is there.
If the label is missing or faded, don't guess. Check the remote's frequency (315MHz or 390MHz) and the style of your wall control. Those two details reliably narrow compatible manuals and replacement parts for older units.
Before you inspect the label, run through this safety check:
- Turn off the opener at the wall switch or unplug it before reaching inside any light housing.
- Use a stable step ladder — never a chair.
- Have your phone ready to photograph whatever you find.
What to photograph for your records:
- The full model and serial number label (close enough to read every digit)
- The antenna wire and which side it exits
- The wall control face (shows console type and any Lock Mode icon)
- Both safety sensor units at the bottom of the door tracks
Alternate identifiers when the label is unreadable:
- Note the remote frequency printed on the remote itself (315MHz or 390MHz).
- Identify the wall control style (simple button vs. multi-function display).
- Count the number of light sockets on the motor head.
- Check whether the unit has a myQ or Wi-Fi indicator light.
- Note the drive type (chain, belt, or screw rail).
| Identifier | Where to Find It | What It Tells You |
|---|---|---|
| Model number | Under light lens, opposite antenna | Exact manual match |
| Serial number | Same label as model | Manufacture date, warranty status |
| Remote frequency | Printed on remote back | Compatible manual generation |
| Wall control type | Wall panel face | Confirms feature set |
What does a LiftMaster manual actually cover?
Most LiftMaster owner and installation manuals follow the same structure, and knowing which section to open first saves real time.
Standard manual sections:
- Safety warnings and pre-installation requirements
- Parts diagram and hardware inventory
- Wiring and control wiring diagrams
- Safety sensor alignment and testing
- Travel and force limit settings
- Diagnostic LED and flash-code tables
- Remote, keypad, and myQ programming
- Troubleshooting flowcharts
- Maintenance schedule
Match the section to your task:
- Sensor problem → go straight to the sensor alignment and LED diagnostics sections.
- Remote won't work → skip to the programming section (Learn button steps).
- Door reverses or stops mid-travel → check travel/force limit settings first.
- myQ won't connect → open the Wi-Fi and app pairing section specifically for your model.
Pages worth printing or saving before any DIY work:
- The wiring diagram page (critical if you ever lose power or swap a wall control)
- The LED flash-code table
- The travel limit adjustment steps
- The sensor alignment diagram
Which manual tasks are safe for homeowners to try?
Work from least invasive to slightly more involved. Stop at the first step that fixes the problem.
- Check remote batteries. Swap them before anything else — dead batteries cause more "opener failures" than any actual fault.
- Check Lock Mode on the wall control. A padlock icon on the display means remotes are disabled by design, not a system failure. Press and hold the Lock button to toggle it off.
- Power-cycle the opener. Unplug for 30 seconds, then restore power. This clears minor logic errors without erasing programmed remotes on most LiftMaster units.
- Clean the sensor lenses. Wipe both photo-eye lenses with a dry cloth. Dust and cobwebs are a leading cause of doors that refuse to close.
- Realign the sensors. Loosen the wingnut on the receiving sensor (green LED), move it gently until the green light turns solid, then retighten.
- Make small travel limit adjustments. Use the adjustment buttons on the motor head as shown in your manual — small turns only, one at a time.
- Re-sync remotes via the Learn button. Press and release the Learn button, then press your remote button within 30 seconds. The manual shows the exact sequence for your model.
Safety callouts — read before you start:
- Disconnect power before reaching inside any housing or touching wiring.
- Never touch the torsion spring above the door. It stores enough tension to cause serious injury.
- If the door feels uneven or heavy when lifted manually, stop and call a technician.
For a deeper DIY maintenance walkthrough, the Mikes garage doors Loveland colorado blog covers sensor cleaning, lubrication, and seasonal checks in detail.
When should you stop DIY and call a professional?
Some problems look like minor fixes but carry real injury risk. The manual itself directs homeowners to call a qualified technician for these.
| Problem | DIY Risk | Action |
|---|---|---|
| Broken or worn torsion spring | Extreme — high-tension metal under load | Call a pro immediately |
| Grinding or burning motor noise | Motor or logic-board damage | Stop use, call a pro |
| Uneven door movement | Track, spring, or cable failure | Call a pro |
| Internal wiring or logic-board fault | Electrical hazard, warranty void | Call a pro |
| Door reverses immediately on closing | Sensor or limit fault (if cleaning fails) | Call a pro if DIY steps fail |
Signs to stop and call right now:
- The door sounds like it's grinding metal on metal.
- You smell burning from the motor head.
- One side of the door sits higher than the other.
- The door moves but won't fully open or close after limit adjustments.
The manual is a reference tool, not a substitute for training, testing equipment, or safety gear. Attempting high-tension spring or logic-board repairs without professional training risks injury and voids your warranty.
Pro Tip: Before the technician arrives, note the exact symptom, when it started, and any recent changes (new remote, power outage, weather event). That 60-second prep cuts diagnostic time significantly.
Check 9 signs your door needs repair now if you're unsure whether your situation qualifies as urgent.
How do you read LiftMaster LED flash codes?
LiftMaster openers use a self-diagnostic LED near the Learn button. It flashes in specific patterns that map directly to root causes. Count the flashes carefully — the up-arrow and down-arrow flash counts are separate signals.
How to read the pattern:
- Watch the LED near the Learn button after a failed operation.
- Count the up-arrow flashes, then count the down-arrow flashes.
- Cross-reference both counts against your manual's flash-code table.
| Up Flashes | Down Flashes | Likely Cause |
|---|---|---|
| 1 | 1 | Sensor wire disconnected or broken |
| 1 | 4 | Safety sensors misaligned or blocked |
| 1 | 5 | Mechanical bind or failing logic board |
| 4 | 6 | Temporary sensor obstruction (e.g., direct sunlight) |
Pro Tip: Photograph the LED while it's flashing — a short video works even better. Send it to support or your technician so they can confirm the code before arriving.
Short troubleshooting flow:
- Confirm the opener has power (wall button works).
- Check sensors for obstructions and clean lenses.
- Check wall control for active Lock Mode.
- Power-cycle the opener (unplug 30 seconds).
- Observe the LED flash pattern and look it up in your manual.
- If the code points to a spring, wiring, or logic-board fault, call a technician.
For a 4-minute diagnostic walkthrough before you call, the Mikes garage doors Loveland colorado blog has you covered.
Does your LiftMaster support myQ Wi-Fi connectivity?
Not every LiftMaster opener supports myQ. Check your manual's cover or the product page first — if myQ isn't listed, the app won't pair regardless of what you try.
myQ setup basics from modern LiftMaster manuals:
- Confirm your model supports myQ before downloading the app.
- Follow the manual's Wi-Fi pairing sequence exactly — the Learn button steps are model-specific.
- Connect to a 2.4GHz network, not 5GHz. Most LiftMaster Wi-Fi modules don't support 5GHz bands.
- Place your router or a Wi-Fi extender within range of the opener if signal is weak at the ceiling.
Common traps that waste an hour:
- Assuming the phone or app is the problem when the opener's Wi-Fi module hasn't been reset.
- Skipping the manual's exact button sequence and trying to pair by app alone.
- Using a 5GHz-only network or a guest network with device isolation enabled.
Pro Tip: Create a temporary phone hotspot and try pairing through it. If it connects instantly, your home network settings (band, isolation, or firewall) are the issue, not the opener. Screenshot each setup screen as you go.
For garage door opener security settings related to myQ and access control, that guide covers the key options.
What warranty and safety rules does the manual spell out?
LiftMaster manuals are explicit about what voids coverage and what creates safety hazards. Knowing these before you start any repair protects both your warranty and your safety.
Actions that commonly void your warranty:
- Performing unauthorized internal repairs on the motor or logic board.
- Modifying or attempting to replace high-tension springs yourself.
- Using non-OEM parts or improper wiring connections.
- Bypassing or disconnecting safety sensors.
LiftMaster manuals state directly: call a qualified service technician for motor, wiring, or spring-related issues. Attempting these repairs yourself not only risks injury — it eliminates warranty coverage on parts that can cost hundreds of dollars to replace.
Pro Tip: Keep a printed copy of your warranty terms with the manual PDF. If a technician performs a repair, ask for a written receipt noting the parts used — that documentation protects your warranty claim if a related issue appears later.
Review garage door safety codes for the broader safety standards that apply to residential and commercial doors in your area.
How do you download the manual and prepare for support?
Download steps:
- Go to support.chamberlaingroup.com/s/manuals-parts.
- Enter your model number in the search bar.
- Select your product from the results.
- Download the owner's manual and, if available, the installation manual PDF.
- Save both to your phone and print the key pages noted earlier.
What to have ready before calling support or a technician:
- Photo of the model and serial number label
- Photo or short video of the LED flash pattern
- Clear description of the symptom and when it started
- Any recent events (power outage, new remote, weather)
- Whether myQ is connected and whether the app shows an error
- Maintenance performed recently (lubrication, sensor cleaning)
Pro Tip: Text or email photos to the technician before the visit. Mikes garage doors Loveland colorado technicians use that visual evidence to arrive with the right parts — which is a big reason 90% of repairs get done the same day.
Key Takeaways
The fastest path through any LiftMaster problem is: locate the model number, download the correct manual, run the safe checks, and call a pro the moment you hit springs, wiring, or a grinding motor.
| Point | Details |
|---|---|
| Get the right manual first | Search your model number at support.chamberlaingroup.com to download the exact PDF for your unit. |
| Three safe DIY checks | Try remote battery swap, Lock Mode reset, and sensor lens cleaning before anything else. |
| Three red flags for a pro | Grinding or burning sounds, uneven door movement, and internal wiring or logic-board faults all require a technician. |
| LED codes guide diagnosis | Count up-arrow and down-arrow flashes near the Learn button and match them to your manual's flash-code table. |
| Mikes garage doors Loveland colorado | Same-day repairs, upfront phone estimates, and warranty-backed service for Northern Colorado homeowners and commercial properties. |
Pro Tip: Save the manual PDF to your phone's photos app — not just a downloads folder. You'll find it in seconds when you need it most.
What we see on the job every week
Most homeowners who call us have already tried something from the manual. That's smart. The manual is genuinely useful for sensor realignment, remote re-syncing, and understanding what those LED flashes mean. Where things go sideways is when a homeowner reads the spring replacement section and decides to try it. A torsion spring under full tension is not a DIY project — it's a safety hazard that can cause serious injury in a fraction of a second.
The other thing we see constantly: people spend 45 minutes troubleshooting a remote that won't work, never noticing the padlock icon on the wall control. Lock Mode is one of those features that's obvious once you know it exists and completely invisible until then.
Mikes garage doors Loveland colorado is family-owned, and we give upfront estimates over the phone — no surprises when we arrive. Veterans get a 10% discount, every repair comes with a warranty, and we complete the vast majority of jobs the same day we're called. If the manual points you toward a repair that involves springs, wiring, or the logic board, that's the moment to hand it off to us.
Northern Colorado homeowners: here's how we can help
When the manual has taken you as far as it can, Mikes garage doors Loveland colorado is the local team that picks up where it leaves off. We handle the repairs the manual explicitly says to leave to a professional — springs, openers, wiring, commercial doors — and we do it with same-day availability and no hidden fees.

What to prepare before we arrive:
- Photos of the model/serial label and the opener head
- A short video of the symptom (door movement, LED pattern, unusual noise)
- Your preferred contact method and access instructions
Our garage door services in Northern Colorado cover opener repair and installation, spring replacement, commercial door service, tune-ups, and emergency repairs. Call us for a transparent phone estimate — we'll tell you exactly what the job involves before anyone drives out.
If you're also planning broader garage upgrades, Expressions Remodeling covers renovation options worth considering alongside a new opener or door system.
FAQ
Where can I download a LiftMaster manual PDF for free?
Go to support.chamberlaingroup.com/s/manuals-parts, enter your model number, and download the owner's or installation manual at no cost.
How do I find my LiftMaster model number?
Check under the front light lens or on the side of the motor head opposite the antenna. The model and serial number label is typically on the side away from the circuit board and Learn button.
What does a 1-flash, 4-flash LED pattern mean on a LiftMaster?
That pattern indicates the safety sensors are misaligned or blocked. Clean the lenses and realign the receiving sensor until its green LED glows solid.
Can I replace a LiftMaster torsion spring myself using the manual?
No. Torsion springs store extreme tension and pose a serious injury risk. LiftMaster manuals direct homeowners to call a qualified technician for spring replacement.
What is Lock Mode on a LiftMaster wall control?
Lock Mode disables all remotes while keeping the wall button functional. It's a built-in security feature — press and hold the Lock button on the wall control to toggle it off.
Useful sources
Official LiftMaster and Chamberlain resources:
- Product Manuals: How to Download Owner's and Installation Guides — Chamberlain Group support
- LiftMaster Manuals and Parts — browse by product type
- LiftMaster Garage Door Opener Support and Troubleshooting — LED codes, sensor help, myQ setup
- Locate Model Number and Manufacture Date — official label location guide
Troubleshooting and DIY guidance:
- How to Find Your Garage Door Model and Serial Number — LearnGarageDoors
- LiftMaster Garage Door Problems and DIY Troubleshooting — TopPro Garage Door
- How to Find Model Number on LiftMaster Garage Door Opener — GarageDoorPedia
Recommended reading on the Mikes garage doors Loveland colorado site:
- Garage Door Opener Not Working? 4-Minute Diagnostic
- How to Service a Garage Door: DIY Guide for Homeowners
- The 7-Point Garage Door Tune-Up Checklist